
📦 Guide to Creating Backups in WordPress with UpdraftPlus
UpdraftPlus is one of the best plugins for creating backups in WordPress easily and automatically. This guide explains how to install it, configure it, and schedule regular backups.
1. Installing UpdraftPlus
Log in to your WordPress admin panel.
In the sidebar, go to Plugins > Add New.
Search for “UpdraftPlus” in the search bar.
Click Install Now, then Activate.
Once activated, you’ll find the plugin under Settings > UpdraftPlus Backups.
2. Creating a Manual Backup
If you want to make an immediate backup:
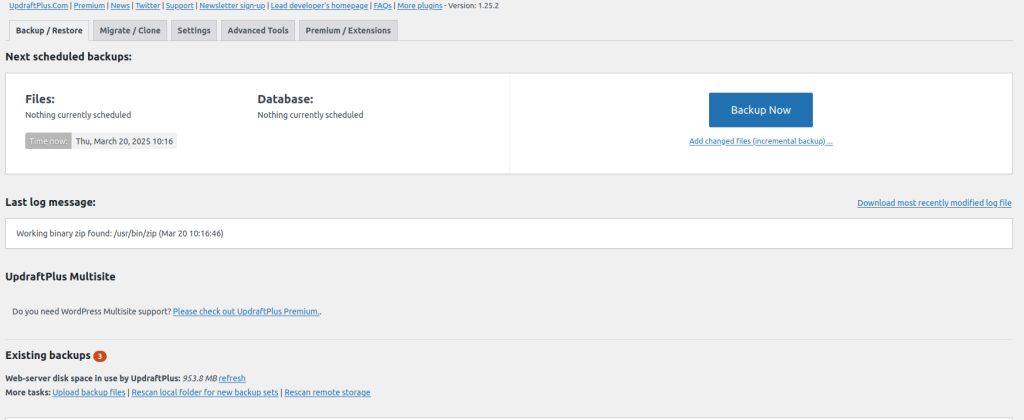
Go to Settings > UpdraftPlus Backups.
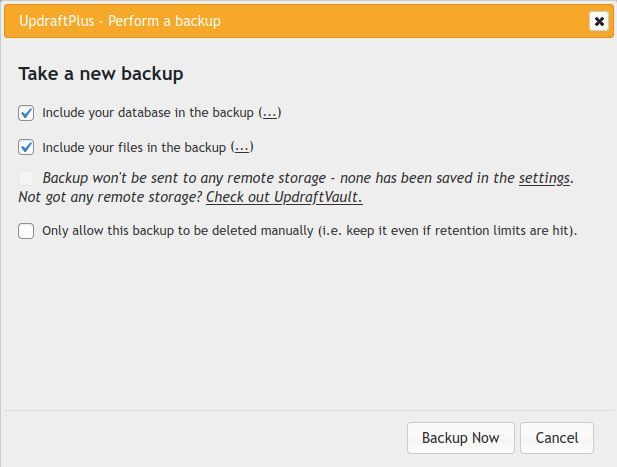
Click the Backup Now button.
Check the options you want to include: Website files and Database.
Click Backup Now and wait for the process to complete.
Once finished, the backup will appear in the list of available backups, and you can download it if needed.


3. Scheduling Automatic Backups
To avoid losing data, it’s best to schedule automatic backups.
Go to Settings > UpdraftPlus Backups.
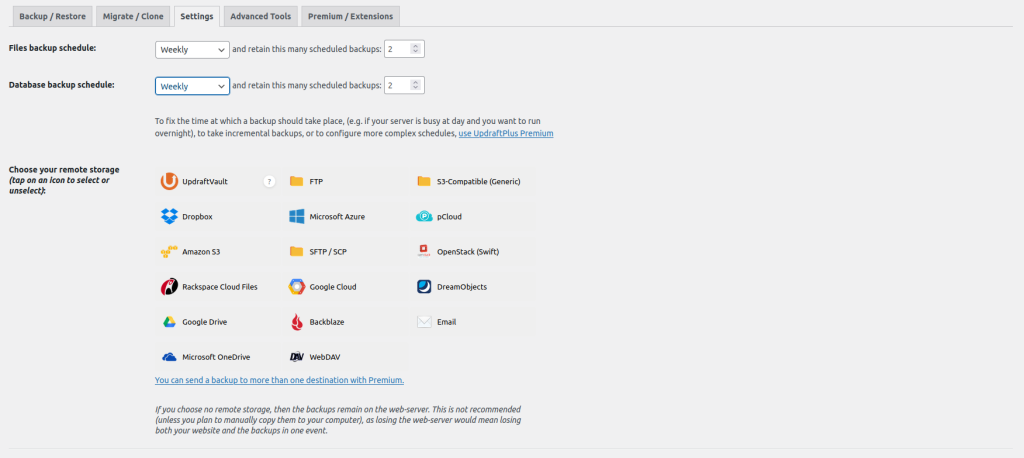
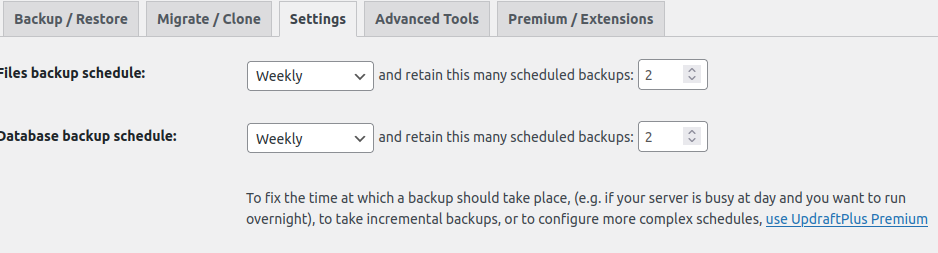
In the Settings tab, configure the backup schedule:
File backups: e.g., once a week.
Database backups: e.g., daily if your site updates frequently.
Set the maximum number of backups to retain (e.g., 5).
Choose where to store the backups (Google Drive, Dropbox, Amazon S3, etc.).
Connect to the storage service by following the instructions provided by UpdraftPlus.
Click Save Changes.
Now, WordPress will automatically create backups according to the schedule you configured.
4. Restoring a Backup
If you need to restore a backup:
Go to Settings > UpdraftPlus Backups.
In the Existing Backups section, find the backup you want to restore.
Click Restore and select the components you wish to recover (database, plugins, themes, etc.).
Follow the steps provided and wait for the process to complete.

5. Final Recommendations
Don’t store backups only on your server — if the server fails, you could lose the backups too. Use external services like Google Drive, Dropbox, or others.
Check periodically that backups are being created successfully.
Always create a manual backup before performing major updates.
🔐 Guide to Secure Credential Management in WordPress
Protecting login credentials is essential to prevent attacks and ensure the security of your website. Below are tips on how to manage credentials securely and best practices to avoid data leaks.
1. Best Practices for Passwords
✅ Use Strong Passwords
Passwords should be at least 12–16 characters long.
They must include uppercase and lowercase letters, numbers, and symbols.
Avoid using names, birthdates, or other easily guessable words.
🔄 Regular Password Changes
Change passwords every 3 to 6 months.
Do not reuse old passwords.
🔐 Do Not Share Credentials
Each user should have their own WordPress account with only the necessary permissions.
Avoid sharing passwords via email or unsecured messaging platforms.
2. Secure Storage of Credentials
🔑 Use Password Managers
Avoid writing down passwords in documents or on paper.
Use password managers like Bitwarden, 1Password, or LastPass to store and generate strong, secure passwords.

🛡️ Do Not Store Passwords in the Browser
Browsers can be vulnerable to attacks. If you need to store passwords, it’s better to use a secure password manager.
3. Enabling Two-Factor Authentication (2FA)
Enabling two-factor authentication (2FA) adds an extra layer of security:
Install a plugin such as Google Authenticator – Two Factor Authentication.
Activate it and link it to an app like Google Authenticator, Authy, or Microsoft Authenticator.
Each time you log in, you’ll need to enter a real-time generated code.
This prevents unauthorized access to your account even if someone knows your password.
4. Login Attack Protection
🚫 Limit Login Attempts
Install a plugin like Limit Login Attempts Reloaded to block IP addresses after multiple failed login attempts.
🔎 Monitor Suspicious Login Activity
Use plugins like WP Activity Log to track login attempts and changes made to user accounts.
5. Access Revocation and Inactive User Cleanup
Delete old or unused user accounts that no longer need access.
Regularly review your WordPress user list and adjust user roles as needed.
Use appropriate user roles (e.g., do not grant administrator access unless absolutely necessary).
🔐 Password Policy in WordPress
To ensure the security of our storage server, we must implement a strong password policy in WordPress. This helps protect user access and prevent potential vulnerabilities. 💻🔒
What Is a Password Policy?
A password policy is a set of rules that define how user passwords should be created to ensure they are secure and hard to crack. For example:
✅ Minimum length (8–12 characters)
✅ Use of uppercase, lowercase, numbers, and symbols
✅ Prohibition of weak passwords like “123456” or “password”
✅ Regular password updates
How to Implement a Password Policy in WordPress?
You can do this in WordPress in two main ways:
🔹 Using a Plugin
The easiest option is to install a dedicated plugin. Recommended options include:
🔸 Password Policy Manager – Allows you to define custom password rules
🔸 iThemes Security – Offers advanced security features, including password policies
🔸 WP Force Password – Forces users to change their passwords based on defined rules
Steps to install a plugin:
1️⃣ Go to Plugins > Add New
2️⃣ Search for the desired plugin and install it
3️⃣ Configure it according to your security requirements
🔹 Manually with Code
If you have access to the server and some technical knowledge, you can edit your theme’s functions.php file and add a function to enforce strong passwords for new users:
function enforce_strong_password( $errors, $sanitized_user_login, $user_email ) {
    if ( isset( $_POST['pass1'] ) && !preg_match('/^(?=.*[A-Z])(?=.*[a-z])(?=.*\d)(?=.*[@$!%*?&])[A-Za-z\d@$!%*?&]{8,}$/', $_POST['pass1'] ) ) {

        $errors->add( 'password_strength_error', '<strong>Error:</strong> Password must be at least 8 characters long and include uppercase letters, lowercase letters, numbers, and symbols.' );

    }

}

add_action( 'registration_errors', 'enforce_strong_password', 10, 3 );
With this code, WordPress will require new users to create strong passwords when registering.